Share
Starts Saturday Feb 1

Tea Party Recipes, DIYs and Etiquette

1 of 24

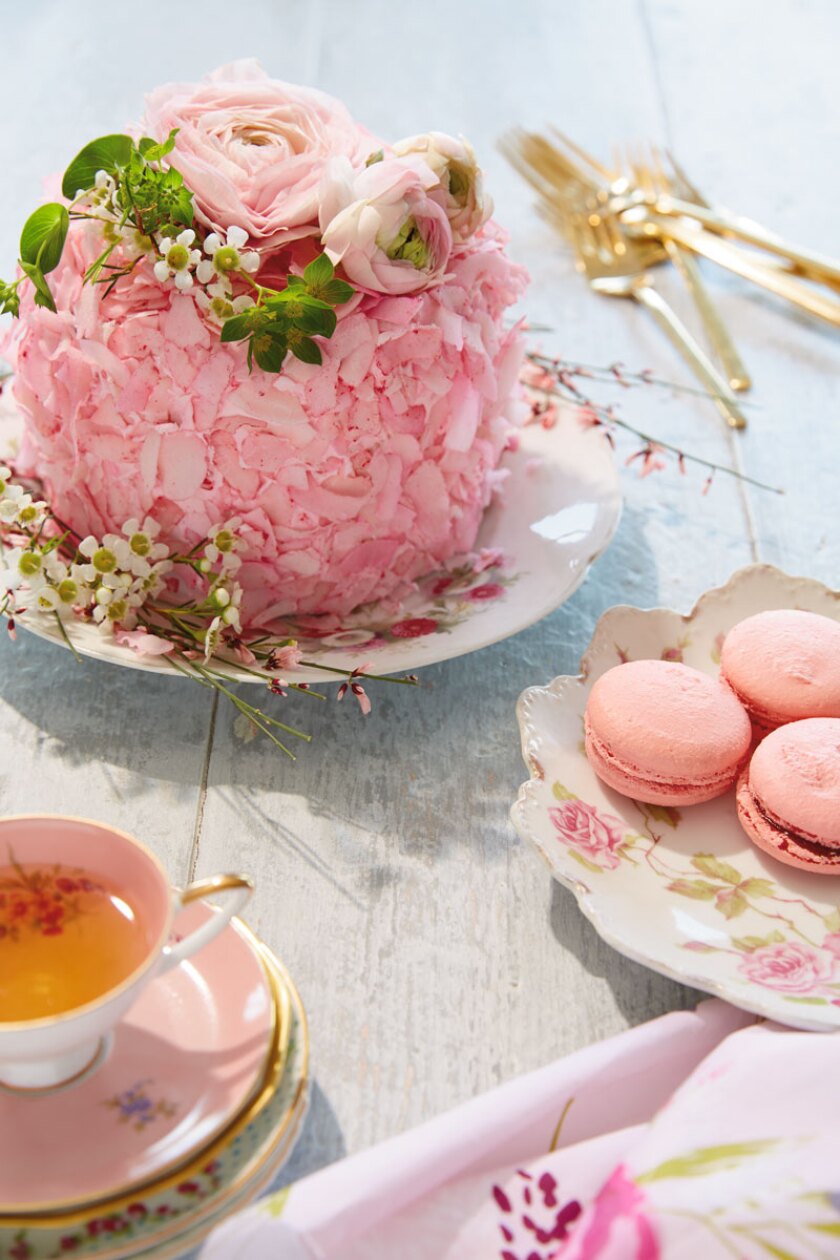
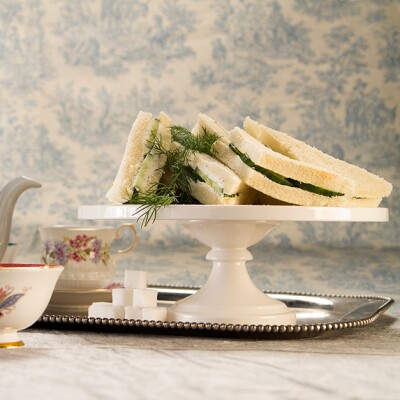
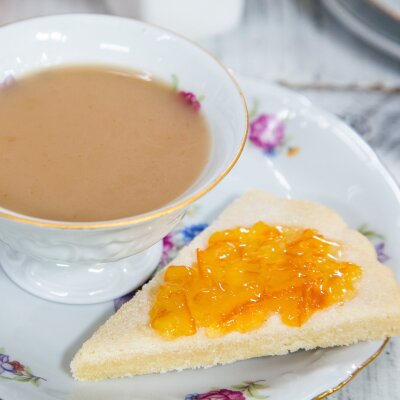
This year, Loveuary on Hallmark is celebrating romance with a little help from Jane Austen and her timeless stories. Inspired by her tales of Regency-era tea parties, balls, and social events, we've assembled a list of etiquette, recipes, and how-to’s for creating and participating in a successful tea party!

And remember to catch all-new Loveuary movie premieres inspired by Jane Austen Saturdays at 8/7c!

2 of 24
align-left

'Afternoon Tea' may not sound quite as glamorous as 'High Tea,' but it's actually the opposite. The term “high” referenced the high tables on which the working class had their evening meals and tea in the early 1800s. Afternoon Tea was served on low tables, and was considered a social affair for those in the upper class. Nowadays, tea is certainly still enjoyed by all, and if you're hosting or attending a tea, be sure to have fun with the decor, attire, food, and drink!

DIY Paper Flower Place Cards
3 of 24
DIY Paper Flower Place Cards
Level:
Intermediate
How-To:
Table Decor, Invitation

MATERIALS:

  • Decorative Paper/Gift Wrap
  • Scissors
  • Glue
  • Pencil

DIRECTIONS:

  1. Cut three pieces for flower shape. The more pieces, the fuller the flower will be. Change up the petal shape for different floral looks.
  2. Curl the petals with a pen or pencil.
  3. Glue pieces together.
  4. Cut two pieces for the flower center. Can be any organic shape.
  5. Glue and overlap the pieces
  6. Create statemen piece by cutting a strip of paper and cut slits into the paper. Leave the bottom uncut for glue.
  7. Add a thin line of glue on the bottom and roll the strip along the bottom.
  8. Glue the entire piece to the center of the flower and fluff up all the pieces.
  9. Attach flower to place card or attach to favor boxes.

*Add ribbon, beads, leaves and extra foliage to accessorize

Download Flower PDF

Galentine’s Day Tablescape
4 of 24
Galentine's Day Tablescape
Level:
Intermediate
How-To:
Home Decor, Party Decor
Seasonal Event:
Valentine's Day, Galentine's Day

MATERIALS:

HEART CENTERPIECE:

  • Foam core
  • X-acto knife
  • Poster board
  • Scissors
  • Hot glue gun and glue sticks
  • Pencil
  • Ruler
  • Cutting mat

BOWS AND POUFS:

  • Horsehair webbing in desired colors
  • Fabric scissors

DÉCOR:

  • White tablecloth
  • Cake stand
  • Faux fur throw
  • Loose faux snow
  • Napkin rings
  • Dashes gel adhesive stickers
  • Silver chargers
  • Flatware
  • Champagne glasses

INSTRUCTIONS:

HEART CENTERPIECE

  1. First you need to create the template. Fold your poster board in half and draw half of a heart. Cut it out then cut the heart in half.
  2. Use your ruler to measure 3” inset from the edge of the heart all around and draw out the line, connect the point at the top and cut the bottom edge flat. Now you have your template!
  3. Place the template onto the foam core, trace and cut out two halves of the heart.
  4. To create the brace for each half of the heart cut a 3” wide foam core rectangle out with a slit cut halfway through the middle that is the width of your foam core. PRO TIP: Cut the top corners off of each rectangle so it’s easier to cover if just using snow.
  5. Cut a slit out of the flat cut bottom of each heart half that is the width of your foam core and to the height of the slit in the other brace.
  6. Slide a brace onto the bottom of each half heart and secure the intersection with hot glue.
  7. Cut a piece of foam core for the base, ours was about 7” x 7”.
  8. Secure one brace to the base with hot glue, position the other half heart about 2-3” in front of the other facing the opposite direction to create a full heart. Mark it before gluing to assure they line up properly.
  9. Place in the center of the table.

BOWS AND POUFS

  1. To create the poufs cut about 20” sections of the webbing and pull the thread in one edge of the webbing to gather one side. Tie a knot to secure. Repeat to create as many as desired.
  2. To create the bows, tie the webbing into a bow and pull taut, trim the excess. Pull and twist the webbing to add volume.

DÉCOR

  1. Place tablecloth and put the cake stand in the middle of the table. Place the heart on the cake stand. Secure the heart to the stand with dashes. PRO TIP: dashes are a removable gel adhesive that won’t ruin surfaces they stick to so they’re ideal for temporary set ups!
  2. Lay the faux fur throw around the stand to create a mound shape.
  3. Sprinkle the snow around and on the throw, especially where you need to disguise the base.
  4. Place the bows all around the mound, if you created multiple colors cascade them from dark to light or vice versa to create an ombré effect.
  5. Attach bows to the napkin rings with a dash or two.
  6. Set the table.
  7. Enjoy!
Tea Party Tablescape
5 of 24
Tea Party Tablescape
Level:
Beginner
How-To:
Home Decor, Party Decor

MATERIALS:

  • Hot glue gun
  • Glasses
  • Plates
  • Saucers
  • Assorted tea cups
  • Candlesticks

INSTRUCTIONS:

  1. Glue plates together with a glass in between to make stand.
  2. Glue tea cups on plates to form centerpiece.
  3. Fill centerpiece cups with flowers.

Petit-Four Stands:

  1. Hot glue small saucer to candlestick holder.
6 of 24
align-left

Have fun with your attire for the occasion! Though gowns, hats and gloves aren't necessary anymore, it's still considered decorum to dress "smart casual" for tea. How you dress will be dependent on the location of your afternoon tea, so make sure to indicate the best attire for your tea party.

DIY Pressed Flower Ornaments
7 of 24
DIY Pressed Flower Ornaments
Level:
Beginner
How-To:
Handmade Gifts, Home Decor

MATERIALS:

  • ½ cup Cornstarch
  • 1 cup Baking soda
  • ¾ cup Water
  • Cookie Cutter
  • Pearl white paint (optional)
  • Floral or craft glue
  • Mod Podge
  • String

DIRECTIONS:

  1. Mix cornstarch, baking soda, and water together in a saucepan over medium heat until it’s thick.
  2. Roll out dough
  3. Use a cookie cutter to punch out shape
  4. Also punch a little hole to string through to hang on tree
  5. Paint your “whit dough” with a pearl white paint for a nice finish (optional)
  6. Dip dried flower into a light, floral or craft glue
  7. Gently press flower onto ornament
  8. Add a top coat of Mod Podge to seal
  9. Leave out to dry
  10. Tie on your string & then hang!
  11. Enjoy your ornament!
8 of 24

Teacups are usually smaller and more delicate than the average mug you have your tea in. When holding your tea cup, make sure to hold the handle between your thumb and your index and middle fingers. Despite what lore says, do not raise your pinky as it's considered rude.

DIY Monogrammed Tea Towels
9 of 24
DIY Monogrammed Tea Towels
Level:
Beginner
How-To:
Home Decor

MATERIALS:

  • Linens
  • Large stovetop pot
  • Strainer
  • Bowl
  • Stirring stick
  • Knife
  • Monogram
  • Iron
  • Water
  • Salt
  • Vinegar
  • Dye source material (Beets, blackberries, onion skins, coffee, or turmeric)

DIRECTIONS:

  1. Cut up desired natural material (beets, blackberries, onion skins etc.) and dump into large stovetop pot
  2. Add water to your stovetop (Use 2x the amount of the dye source material so for one cup of beets, 2 cups of water.)
  3. Let simmer for 1 hr
  4. Strain and let cool
  5. Soak tea towel in dye. The longer you let it soak the richer the color will be.
  6. Let dry
  7. Wash linens
  8. Once freshly washed and dried, add monogram with iron
  9. Enjoy!


Tea Towel Prep:

  1. If you are using a new item, wash it before starting your project
  2. Based on your dye you will place your towels into simmering water for approx 30 mins-1hr.
  3. For fruit based dyes use ¼ cup of salt and 4 cups of water
  4. For vegetable based dyes use 1 cup of vinegar and 4 cups of water
10 of 24

Tea should be served by the host, and the teacup should be filled to about three-quarters of the way to leave room for milk and sugar. The pouring of the tea by the host is a show of goodwill and friendship. Also, do remember to pass your teacup along with the saucer to the person pouring.

When you stir your tea, make sure not to clink your spoon against the cup as it is considered rude. Instead, swish the spoon back and forth without touching the sides of the cup to prevent scratching. The spoon should then be placed on the saucer behind the teacup to the right of the handle.

Lemon Ginger Tea
11 of 24
INGREDIENTS:
  • Fresh ginger
  • Fresh lemon
  • Warm water
  • Warm water

DIRECTIONS:

Lemon Ginger Tea:

  1. Add lemon and ginger slices into a pot and let it steep in hot water.
  2. The longer you steep it, the more flavor packed and nutrient dense it will be. For a softer flavor, cut a small piece of ginger put it in your cup with some lemon and pour hot water.

Additions:

• Garlic (anti-inflammatory and immune system boost)
• Cayenne pepper (add with garlic, helps break up phlegm)
• Fresh grated turmeric (anti-inflammatory and antioxidant)

Cinnamon Tea
12 of 24
Cinnamon Tea
Course:
Beverage, Tea
INGREDIENTS:
  • ½ C water
  • 1-3 Cinnamon sticks

DIRECTIONS:

  1. Combine in pot
  2. low broil
  3. Strain and Serve
Brown Sugar Berry Cider and Chamomile Ginger Tea
13 of 24
Brown Sugar Berry Cider and Chamomile Ginger Tea
Course:
Beverage, Tea
Time:
2+ hrs
INGREDIENTS:

Ingredients for Brown Sugar Berry Cider

  • 2 quarts Apple Cider (unfiltered is best, look for something cloudy and dark/opaque)
  • 6 Cinnamon Sticks
  • 2 teaspoons Whole Cloves
  • 2 Star Anise
  • 12 ounces Mixed Berries (Raspberry, Blackberry, Blueberry are best)
  • 3 Apples (your favorite variety), cut into wedges
  • 2/3 cup Brown Sugar, packed (use to taste)
  • Pinch Sea Salt

Ingredients for Chamomile Ginger Tea

  • 4 cups Water
  • 4 cups White Grape Juice
  • 6-10 inches Fresh Ginger, peeled and sliced thinly
  • ¼ cup Dried Chamomile Flowers
  • Juice of 2 Lemons
  • Honey, to taste (sometimes not necessary at all, if you like the sweetness level of white grape juice)

DIRECTIONS:


Brown Sugar Berry Cider

  1. Add cider, cinnamon sticks, cloves, star anise, berries, and sliced apples to saucepan. Bring to a boil over medium-high heat, then immediately lower and simmer for 30-40 minutes.
  2. Strain the cider and sweeten with brown sugar and sea salt to taste. Stir over low heat until sugar has dissolved.
  3. Serve warm in mugs with additional apple slices and fresh berries as garnish.

Chamomile Ginger Tea

  1. Add water and grape juice to slow cooker and turn heat on high. Once liquid is hot, add ginger and chamomile, cover the lid and cook for 2 hours on low.
  2. When ready, strain out ginger and chamomile leaves, then season tea with fresh lemon juice and honey (both to taste, for each portion or the entire batch).
14 of 24
align-left

When taking a sip of your tea, leave the saucer on the table and raise the teacup toward you. In the occasion that you are standing, hold the teacup with your right hand, and the saucer with your left.

Make sure not to blow on your tea, even if it’s too hot. Some teas, such as herbal teas, require up to 10 minutes of steeping for it to reach its full flavor. Instead, sit the cup back down on your saucer, and relax while you wait for it to cool down.

Homemade Lavender Lemonade
15 of 24
Homemade Lavender Lemonade
Course:
Drinks
Time:
Prep. Time: 5-10 mins., Cook Time: 10-15 mins.
INGREDIENTS:
  • 1¼ cup sugar
  • 1 cup water
  • 2 tablespoons lavender
  • 1 cup freshly squeezed lemon juice
  • Lavender springs for extra decoration; optional
  • Extra lemon slices for decoration; optional

DIRECTIONS:

  1. Place the sugar and water into a pan and stir together over medium heat until the sugar dissolves
  2. Place the lavender into the pan and stir together
  3. Once the mixture starts to lightly boil turn the heat down to a simmer
  4. Simmer the mixture together for about 10 minutes
  5. Allow it to cool
  6. Juice the lemons to get 1¼ cup of lemon juice
  7. Combine the lemon juice with 4 cups of water
  8. The lavender simple syrup will yield about 1 cup; add ¾ cup of it to the lemon juice/water mixture
  9. If you would like it sweeter you can add the other ¼ cup!
  10. Add ice and serve
  11. To make this a cocktail simply add as much vodka as you like...start with a shot and go from there

Get the Instructions to the DIY Easter Tray and Drink Stirrers >>

Green Tea Lemonade
16 of 24
Green Tea Lemonade
Course:
Beverages
Cuisine:
American
Yield:
4 Servings
Time:
Prep Time: 10 mins.
INGREDIENTS:
  • 20 oz. bottled or fresh brewed Green Tea
  • 20 oz. bottled or fresh lemonade
  • White peaches, chunked
  • Fresh Bing cherries with stems
  • 1 package (0.66 oz.) mint plus 1 sprig for garnish
  • Crushed ice

DIRECTIONS:

  1. Combine tea and lemonade in a pitcher.
  2. Add chunked peaches, cherries and mint.
  3. Muddle (crush) the mint.
  4. Serve over crushed ice and garnish with a sprig of mint.
17 of 24

Be sure to start with savory food at your tea party, and finish up with the sweets. Sandwiches go first, followed by scones, and any super-sweet desserts last. Do not dunk your scones or any other treats in your tea; rather, eat bites of your baked goods in between sips of tea

And on this particular occasion, it is considered proper to eat with your hands! Use your fingers to eat your sandwiches, scones and sweets. You may, however, use silverware when necessary to spread jams and cream on your scone, or eat a piece of cake.

DIY Tiered Tea Stand
18 of 24
DIY Tiered Tea Stand
Level:
Intermediate
How-To:
Home Decor, Dinning Decor

MATERIALS:

  • 3 plates/saucers
  • Cake Stand Hardware Kit
  • Drill with a Diamond Hole Saw Bit
  • Sponge & Water
  • Screw Driver

DIRECTIONS:

  1. First drill holes into middle of plate using a drill with a diamond hole saw bit. Start at an angel until you get a ledge then straighten it out. Use a sponge soaked in water to wet the area you’re drilling so it won’t overheart.
  2. Repeat this step in the middle of each plate.
  3. To connect all you need to do is add a washer to the screw and thread it into the bottom of the biggest plate. Add another washer and screw on the first riser. Add another washer and thread through middle plate. Repeat these steps until you reach the top. Use a screw driver to tighten them in place.
  4. Enjoy!
Tea Sandwiches and Pastries
19 of 24
Tea Sandwiches and Pastries
Course:
Brunch, Lunch, Sandwich
INGREDIENTS:

For Ribbon Sandwiches

  • 4 carrots, steamed and smashed with salt and pepper
  • 1 large red beet, boiled, cooled and smashed with salt and pepper
  • 1 batch of pesto (ingredients below)
  • 1/2 cup pine nuts, toasted
  • 2 cloves of garlic
  • 2 cups of basil leaves
  • 2 cups of spinach
  • 1 lemon
  • 1/4- 1/2 cup olive oil
  • salt and pepper to taste

For Cashew Cheese, Arugula and Cranberry Tea Sandwiches

  • 2 slices of bread
  • 1 cup fresh arugula
  • 1 can cranberry sauce
  • 1 batch of cashew cheese (ingredients below)
  • 1 cup raw cashews
  • 4 tbsp. Coconut oil
  • 1/2 cup lemon juice
  • 3 tbsp. Filtered water
  • ½ tsp. Sea salt

For Cucumber Chickpea Salad Sandwiches

  • 1 English cucumber, sliced
  • 1 can of chickpeas, drained and rinsed
  • 1 stalk of celery, finely chopped
  • 8 red grapes, finely chopped
  • 3 tbsp. vegan mayonnaise
  • 1 tsp. whole grain mustard
  • 1/2 tsp. chopped fresh dill
  • salt and pepper to taste

For Vegan Toll House Cookies (makes 3 dozen)

  • 2 1/2 cup flour (if making gluten free, I like Hodgson Mills or Glutino mix)
  • 1 teaspoon baking soda
  • 1 teaspoon sea salt
  • 1 teaspoon cinnamon
  • 1 cup (2 sticks) vegan butter, room temperature
  • 1/2 cup sugar
  • 1 cup brown sugar
  • 1 teaspoon vanilla extract
  • 2 flax eggs (2 tbsp. ground flax seeds mixed with 6 tbsp. water, let sit 5 minutes)
  • 2 cups chocolate chips or chunks
  • 1 cup chopped nuts (optional. I like walnuts and pecans)

DIRECTIONS:

Pesto Sauce

  1. Place the basil and spinach in the food processor topped with the garlic and nuts. Pulse a few times to break them down a bit. Add in the zest from the lemon and all the lemon juice. Pulse again and then drizzle in the olive oil until the pesto is smooth.

Ribbon Sandwiches

  1. Margarine, room temperature (Earth Balance spreads best)
  2. 4 slices of bread
  3. To assemble, Lay 4 slices of bread out. Butter all the slices with the margarine. Spread one of each of the topping on one slice of bread.
  4. Stack them starting with the pesto, then beet, then carrot. Top with the remaining slice of bread. Cut the crust off the bread and then cut into 2 or 4 triangles.

Cashew Cheese Spread

  1. Place the cashews in a small pot and cover with water. Bring to a boil, remove the lid and let boil for 8 minutes. Drain and rinse. Place cashews in a blender pitcher with the rest of the ingredients and blend until creamy.

Cashew Cheese, Arugula and Cranberry Tea Sandwiches

  1. Assemble the sandwich by spreading one side of bread with the cranberry sauce and the other with the cashew cheese spread. Add a handful of arugula in the middle and press slices together. Trip crust off and cut into 2 or 4 triangles.

Bread I recommend for sandwiches: https://thrivemarket.com/p/schar-artisan-baker-white-bread or https://www.amazon.com/Katz-Gluten-Free-Bread-Ounce/dp/B00KABUWF2

Cucumber Chickpea Salad Sandwiches

  1. Half smash the chickpeas with a fork then combine well with all the other ingredients. Sandwich between two slices of cucumber.

Toll House Cookies

  1. Heat your oven to 375 degrees.
  2. Combine the flour, baking soda, salt, and cinnamon in a medium bowl.
  3. In a separate bowl, cream the butter and sugars with a hand mixer. Mix in the vanilla extract and flax eggs.
  4. Gradually beat the dry ingredients into the wet ingredients. Fold in the chocolate chips and nuts.
  5. Drop rounded tablespoons of dough on to a cookie sheet and bake for 9 minutes.
  6. Cool on baking racks and enjoy!

Make delicious Cucumber Dill Tea Sandwiches

Cucumber Dill Tea Sandwiches
20 of 24
Cucumber Dill Tea Sandwiches
Course:
Lunch, Appetizers
Cuisine:
American
Yield:
6
Time:
Prep Time: 15 mins.
INGREDIENTS:
  • 1 package (4 ounces) cream cheese, softened
  • 1 tablespoon fresh dill, chopped
  • 1 teaspoon fresh lemon juice
  • Kosher salt and fresh ground black pepper, to taste
  • 12 slices good quality thin sliced white bread, crusts removed with serrated knife, for best results
  • ½ English (hothouse) seedless cucumber, thin-sliced into 48 slices

DIRECTIONS:

1. In a small bowl, combine cream cheese and dill, lemon juice and stir to blend; season to taste with kosher salt and pepper.
2. Spread the cream cheese mixture evenly on 12 slices of bread; arrange 6 of the cream cheese covered bread slices on flat work surface.
3. Top each with 6 cucumber slices; close with top halves of tea sandwiches and press lightly to close. Using a serrated knife carefully cut off crusts.
4. Diagonal slice each sandwich in half and arrange on a serving plate. Garnish with additional fresh dill sprigs, if desired.
5. Serve immediately or cover and refrigerate to hold.

Try these other tea sandwiches and pastries recipe

Scottish Shortbread
21 of 24
Scottish Shortbread
Course:
Dessert, Snack
Cuisine:
Scottish
Time:
Cook Time: 15-20 mins.
INGREDIENTS:
  • 1-cup all-purpose flour
  • 3 tablespoons fine semolina or ground rice
  • Pinch of salt
  • 1⁄4 cup superfine sugar, plus extra for sprinkling
  • 1 stick cold unsalted butter
  • (8 inch round shallow cake tin)

DIRECTIONS:

  1. Preheat oven to 325 degrees.
  2. Shift flour, semolina and salt into a mixing bowl.
  3. Stir in the superfine sugar.
  4. Crumble the butter into the bowl and rub into the dry mixture with your fingertips to make fine crumbs.
  5. Knead the mixture together with your hands until you have a smooth, dough like texture.
  6. Place in the middle of the cake tin.
  7. Using your hands, press the mixture out to fill the tin in an even layer.
  8. Bake in the oven for 15-20 minutes, until the shortbread is slightly colored.
  9. Remove from the oven and leave to stand in the tin for 10 minutes until the shortbread has firmed up a little but is still warm.
  10. Cut into wedges, sprinkle with superfine sugar and leave to cool and harden in the tin.
Passionfruit Macarons
22 of 24
Passionfruit Macarons
Course:
Dessert
Yield:
36 Macarons
Time:
Prep Time: 2+hrs, Cook Time: 12 mins.
INGREDIENTS:

Macaron Shells (Makes a total 36 macarons):

  • 110 grams egg whites (55grams x 2) (preferably, aged egg whites)
  • Powder food coloring - 1/2 tsp lavender powdered food coloring + 1/2 teaspoon red powdered food coloring.
  • 150 grams powdered sugar
  • 150 grams super fine almond flour from blanched almonds
  • 40 grams water
  • 150 grams granulated sugar

Passionfruit Filling:

  • 65 grams granulated sugar
  • 4 large eggs (200 grams)
  • 140 grams passion fruit puree
  • 20 grams freshly squeezed lemon juice

DIRECTIONS:

Macaron Shells:

  1. Place 55 grams egg whites in bowl of stand mixer. Start whisking on low.
  2. Place 55 grams egg whites in separate bowl. Add food coloring and whisk to combine.
  3. Sift almond flour and powdered sugar into a large bowl.
  4. Prepare the Italian meringue. Place water in small pot over medium heat. Add the granulated sugar. Without stirring, cook on medium until 115 C / 239 F, or when bubbles slowly break the surface.
  5. Increase speed on mixer to high. The egg whites should be just starting to form peaks as the sugar syrup reaches 118 C/ 244 F. Pour the hot syrup into the whisking egg whites, as the mixer is going. Continue to whisk on high for one minute. Reduce speed to medium and continue to whisk for 4-5 minutes, until the mixture cools slightly to 50C/122F.
  6. Meanwhile, prepare piping bags and use a rubber spatula to incorporate the dyed egg whites to the powdered sugar/almond mix. Add a quarter of the meringue to the almond mix and stir it in to lighten the mixture. Add the remaining meringue and fold it in until the mixture is incorporated, starts to shine, and slowly falls off the spatula when lifted.
  7. Transfer mixture to a piping bag with an 11-pt tip. Pipe according to the template on a silplat-lined baking sheet. Once a full sheet of macarons of have been piped, pick up the baking sheet and drop it on a table from about 5 inches. Let the shells sit undisturbed for 2 hours. Preheat oven to 325F.
  8. Once the shells are no longer wet (if you lightly touch them with your finger, they should feel dry), bake them in a 325F oven for about 12 minutes. After the first 8 minutes, open the oven door slightly, and then close it. Repeat this step after 10 minutes. Once the macaron shells are cooked, remove the pan from the oven, and transfer it to a cooling rack. After about 10 minutes, remove the macaron shells from the lined pan. (If you don’t remove them, they may end up sticking.)

Filling:

  1. Add the sugar and eggs to a large glass bowl. Whisk to combine. Whisk in the passion fruit puree and lemon juice. Place the bowl over a pot of simmering water. The bowl should not touch the water. Whisk continuously until the mixture thickens and reaches 165F on an instant-read thermometer. Remove the bowl from on top of the pot and immediately pour the curd through a strainer into a medium-sized bowl. (The strainer will strain out any curdled bits.)
  2. Let the mixture sit for 10 minutes. Stir in the softened butter. Use an immersion blender and blend for 2 minutes, until the mixture is creamy and smooth. Cover the mixture with plastic, touching the cream, and allow to set in the refrigerator for at least 3 hours.
  3. Once the cream is set, assemble the macarons by piping the filling in the center of half of the macaron shells. Place a shell on top of each. Refrigerate overnight, which allows the filling to set. Remove from the refrigerator about 10 minutes before serving. The macarons should be served at room temperature.

Check out the recipe for Chocolate Orange French Macarons

Southern Tea Cakes
23 of 24
Southern Tea Cakes
Course:
Dessert
Time:
Prep Time: 2+ hrs., Cook Time: 18-20 mins.
INGREDIENTS:
  • 4 C Flour
  • 2 C Sugar
  • 1 tsp baking soda
  • 1 tsp baking powder
  • 1 C Unsalted Butter, softened
  • 2 eggs
  • 1/2 C milk
  • 1 tsp vanilla extract
  • 1 1/2 tsp of lemon extract
  • 1 tbsp lemon zest

DIRECTIONS:

  1. These are soft, warm, tender pieces of your past. They aren’t sweet like a sugar cookie. They are the perfect amount of sweetness to encourage you to eat three or four in one sitting. The middle is always soft and the edges never brown.
  2. Cream together butter and sugar.
  3. Add in the eggs one at a time. Stir in the vanilla and lemon extract as well as the lemon zest.
  4. Stir in the milk.
  5. In a medium bowl, combine flour, baking soda, and baking powder. Add that to the wet ingredients in increments. The dough will be stickier than traditional cookie dough. DON’T FRET!
  6. Preheat the oven to 325 degrees. Chill the dough for at least two hours. If you don’t, the cookies will melt into a glob in the oven.
  7. Bake for 18-20 minutes. When you remove them from the oven they will look slightly underdone and smooth on the top. Let them cool on a baking rack if available.
Bee Sting Cake for Two
24 of 24
Bee Sting Cake for Two
Course:
Dessert
Cuisine:
American
Yield:
Serves: 2
Time:
Prep Time: 15 mins., Cook Time: 30 mins.
INGREDIENTS:
  • ⅓ cup milk, room temperature
  • ½ cup unsalted butter, room temperature
  • 2 large eggs
  • ¾ cup all-purpose flour
  • 2 tablespoons granulated sugar
  • ½ teaspoon salt
  • 3 tablespoons honey
  • 2 cups of flour

DIRECTIONS:

  1. Preheat oven to 400°F.
  2. Coat a 9x13 cake pan with non-stick cooking spray.
  3. In a medium bowl combine milk, butter and eggs.
  4. Gradually add in sugar, flour and salt. Mixing well.
  5. When batter is smooth, add 3 tablespoons honey and continue to mix.
  6. Place the dough in a bowl, cover with plastic wrap and let rise for an hour.
  7. Bake 25 to 30 minutes.
  8. For the topping:
  9. Combine 1 cup of almonds with ½ cup granulated sugar and 4 tablespoons honey, stirring well.
  10. Apply to top of the cake in layers; you will lose some in the process but continue adding layers until you run out.

Try out this Lemon Elderflower Bundt Cakes recipe

ADVERTISEMENT
ADVERTISEMENT
ADVERTISEMENT