Share

New Year New Movies! DIYs

Embellished Cardigans
1 of 20
Embellished Cardigans
Level:
Beginner
How-To:
Fashion
Seasonal Event:
Christmas

MATERIALS:

Cardigan
Embellishing trim
Needle and thread, fabri-tac or iron
Scissors
Thin cloth if ironing on
Straight pins if sewing

INSTRUCTIONS:

  1. Decide where you’d like to place embellishing trim, measure out the length of trim needed.
  2. Cut the trim to length.
  3. Attach the trim to the cardigan. How you do this depends on the type of trim you’ve got.
    • To attach iron-on trim, iron it on with a thin piece of fabric covering the trim and cardigan, flip the cardigan over, place a piece of fabric over to cover and iron again.
    • To sew the trim on, pin the trim in place first with straight pins. Tie a knot at the end of your thread and whipstitch along each edge of the trim into the fabric. Knot to secure at the end.
    • To glue the trim on, apply glue to the backside of the trim on each edge, press to secure. Work in small sections.
  4. If you’ve glued, allow the glue to dry for 24 hours before wearing. Enjoy!

Click here for more Christmas crafts

Get more from the episode >>

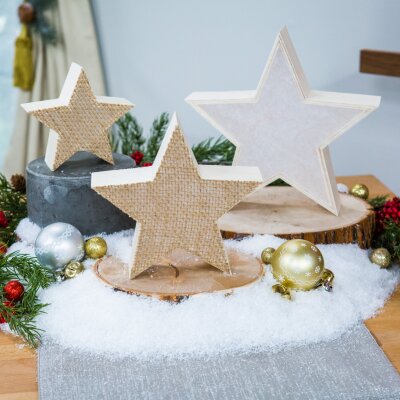
DIY Burlap Star Luminaries
2 of 20
DIY Burlap Star Luminaries
Level:
Beginner
How-To:
Home Decor
Seasonal Event:
Christmas

MATERIALS:

  • Wooden star frames
  • Tracing paper
  • Burlap
  • Led fairy lights
  • Spray adhesive
  • Fabri-tac
  • X-acto knife
  • Cutting mat

INSTRUCTIONS:

  1. If creating the burlap covered star, spray adhesive onto the burlap and lay the tracing paper on. Press and smooth to adhere well. You can skip this step and just use tracing paper for a more minimal look.
  2. Apply fabri-tac to the front edge of the star, place the burlap with tracing paper on top then press and smooth to make sure it adheres well.
  3. Flip the star fabric side down onto your cutting mat and use the edges of the star as your guide to cut as close to the edge as possible with an x-acto.
  4. Place the fairy lights inside the star frame, arrange and bend them as desired. Leave the battery pack outside of the star. PRO TIP: Do this with the lights turned on. It will allow you to see how you want them arranged for the best effect.
  5. Lay a line of fabri-tac on the back edge of the star and place a piece of tracing paper on. Press and smooth to adhere well.
  6. Place the star back side down on the cutting mat and cut the tracing paper to the edge of the star. Make sure to avoid the cord of the lights.
  7. Repeat steps 1-6 to create as many star luminaries as desired, place in your décor and enjoy!
Kelly Edwards - DIY Christmas Sweater Vases
3 of 20
Kelly Edwards - DIY Christmas Sweater Vases
DIY Christmas Sweater Vases
Level:
Beginner
How-To:
Home Decor

MATERIALS:

  • Sweaters
  • Vases
  • Fabric scissors
  • Chunky twisted yarn or twine and large buttons
  • Hydrangeas or poinsettias
  • Hypericum berries
  • Optional:
    • Battery-powered candles

INSTRUCTIONS:

  1. Lay the vase down on its side on the sleeve to measure the needed length. Cut with about 2” excess on each end
  2. With the end of the sleeve at the top, slide the sweater sleeve over the vase and fold the cuff over to finish the top edge. PRO-TIP: If you are making multiple vases or votives and have two frayed ends on the sweater piece, fold the top end inward instead of outward.
  3. Add decorative details if desired. Cut then unwind a piece of chunky yarn, use just one of the strands to tie a bow around the top portion of the vase or weave some twine through a large button and tie it around the top to secure.
  4. Fill the vase with Christmassy flowers or the votive version with a battery-powered candle and enjoy!

Click here for more Christmas crafts

Get more from the episode >>

DIY Statement Shawls
4 of 20
DIY Statement Shawls
Level:
Beginner
How-To:
Fashion

DIY STATEMENT SHAWL MATERIALS:

  • Shawl
  • Sequin iron on transfer or fabric
  • Iron or Fabri-tac
  • Fabric marker or chalk
  • Scissors
  • Optional:
    • Removable vinyl letters

INSTRUCTIONS:

  1. Put your shawl on to decide what placement and size will look best and be most visible.
  2. Draw out the letters for the phrase onto the sequin transfer or fabric. Use removable letters to trace if you aren’t comfortable free handing. PRO TIP: if you want you can skip this step, purchase pre-cut iron on letters.
  3. Cut the letters out using fabric scissors.
  4. Adhere the letters to the shawl, either iron on according to the instructions of your transfer or use fabric-tac to adhere fabric.
  5. Allow the adhesive to set, wear, and enjoy!

Get more from the episode

DIY Fridge Snowman
5 of 20
DIY Fridge Snowman

MATERIALS:

  • Foam Sheets
  • Magnets
  • Hot Glue
  • Scissors
  • Marker or Paint Pen

INSTRUCTIONS:

  • Cut out all the pieces you would use to build a snowman from foam sheets (carrots, coal, buttons, scarf, hats, pipe, etc.). Create as many pieces as you would like if you want more options available, like different size carrots and different hats.
  • Use a marker or paint pen to create details if desired.
  • Then, hot glue magnets onto the back of the pieces. Because of their weight, some pieces may require more than one magnet.
  • Once all of the pieces are finished, you can build your snowman.

Click here for more Christmas crafts

Get more from the episode >>

DIY Winter Village
6 of 20
DIY Winter Village

MATERIALS:

    FOR THE HOUSES:

      1” x 6” or other desired widths cut to:

      • 16”
      • 20”
      • 22”
      • 24”

      FOR THE BASE:

        1” x 10” cut to:

        • 36” x1

        1” x 2” cut to:

        • 36” x4

        OTHER MATERIALS:

        • Wood glue
        • Nail gun
        • White paint
        • Gray paint
        • Paintbrushes
        • Masking tape
        • Gaff or duct tape
        • Glitter tulle or other sheer ribbon
        • Jigsaw
        • Sandpaper
        • Pencil

        OPTIONAL:

        • Chop or circular saw
        • 1 ½” screws and power drill

        INSTRUCTIONS:

        1. Measure out your cuts and cut all your wood. Make as many houses as you want but remember you only have 36” of width and room for three tracks. PRO TIP: All of the straight cuts can be done for you at the hardware store.
        2. To create the peak of each house, mark the center of the wide face of the plank at one end. Measure down on each side how many inches you want to cut off the corners. Use a straight edge or speed square to create a connecting line from the mark on each side to the center. PRO TIP: You can make asymmetrical peaks as well, have fun with creating different angles!
        3. Use a jigsaw to cut the corners off of the plank, now you have the peak of your house!
        4. To add windows measure and mark 2” w x 2 ½” h rectangles inset at least 1” from each edge of the house at whatever height desired.
        5. Use a drill bit slightly bigger than the blade of your jigsaw to make a hole in a corner of each window and cut the edges out with the jigsaw.
        6. To create the base with tracks apply wood glue to the bottom of each 1” x 2”, secure the 1” x 2” to the base with a nail gun. Use the pieces of wood you’re using for the houses as a spacer between each 1” x 2”. If you’re painting leave a little extra room so the pieces can still fit. PRO TIP: If you don’t have a nail gun you can use 1 ½” screws and a drill from the bottom up so you don’t see the screws.
        7. Paint everything white. Allow to dry.
        8. Paint a 1” gray border around the edges of each house. Allow to dry.
        9. Tape the sheer ribbon behind each window.
        10. Place the houses in their track, remember they.
        Shirley Bovshow “Primrose Care”
        7 of 20
        Shirley Bovshow “Primrose Care”

        THREE VARIETIES OF PRIMROSE:

        • Common Primrose- low growing with flowers growing through center. Has dark “eye” color in center
        • Fairy Primrose- tiny flowers on tall stems
        • Obonica Primroses- tall flower clusters medium sized flowers

        IF YOU ARE GROWING THEM INDOORS:

        • Cool temperatures indoors (55-65 degrees)
        • They do not like heaters or dry air.
        • Keep the soil consistently moist
        • Bright light but no direct sun
        • A plant light will prolong blooms

        WATERING TECHNIQUES:

        • Water from below (put water in saucer)
        • Water from above by lifting leaves and watering soil directly (trim bottom leaves touching the soils)
        • Wet moss and place on soil to create humid environment

        MULTIPLING THE FLOWERS:

        Primroses grow in clusters that spread. The Easiest and most successful way to multiply primroses are through division. Divide the clusters after they finish blooming like this

        INSTRUCTIONS:

        1. Remove primrose from pot
        2. Divide plant into smaller sections with roots attached
        3. Cut top of leaves and trim roots if needed
        4. Place in well-draining moist potting soil

        HOW LONG WILL BLOOMS LAST?

        OUTDOORS - 6 to 10 weeks depending on weather conditions outdoors

        INDOORS - Enjoy flowers for 4 weeks and plant them outdoors when the ground thaws for another round of blooms in the spring

        HOW SOON WILL ROOTS FORM?

        • 3-4 Weeks

        Get more from this episode >>

        DIY Woodland Floor Lamp
        8 of 20
        DIY Woodland Floor Lamp

        MATERIALS:

        • Wooden sticks either from outside or decorative craft store is fine
        • Wooden craft round
        • Electrical light cord
        • 1” Wooden dowel cut into four equal sizes to create the legs of your lamp
        • Forstner bits one the proper size to create a hole for you dowel and one large to fit the light cord.
        • Mallet
        • Masking tape
        • Small screws
        • Power drill
        • Nail gun

        OPTIONAL:

        • Wood glue

        INSTRUCTIONS:

        1. First you want to create the hole for your electrical socket to fit in. Find the center of your wooden craft round and drill through it with your larger Forstner bit. This will be messy, so it is best to do it outside.
        2. To create the legs for your lamp, put the Forstner bit into your drill that is the proper size for your dowels. Tape off with some masking tape how deep the hole should be.
        3. Mark four spots on the bottom of the round. Drill into the bottom of the round to the masking tape.
        4. Put the dowels into the holes, add wood glue for security.
        5. Put the socket into the hole and screw through the provided holes into the wooden round to secure it. Now you’ve got the base of your lamp!
        6. Flip the base over and put the lightbulb in. Plug it in and make sure everything still works.
        7. Use your nail gun to start attaching sticks to the edge of your wooden craft round. Adding large sticks first, then smaller. Make sure the sticks go all the way to the ground so that they cover the base. PRO TIP: Leave a space for your hand to go through and remove the lightbulb if necessary, you should also be able to do this from the top depending how tall your sticks are.
        8. Place, plug in and enjoy!

        Get more from this episode >>

        DIY Double Gloves
        9 of 20
        DIY Double Gloves

        MATERIALS:

        • 2 pairs of knit gloves each in a different color
        • Fabric scissors
        • Chalk or fabric marker

        OPTIONAL:

        • Iron on patches and iron
        • Piece of protective fabric
        • Fray Check

        INSTRUCTIONS:

        1. On outer gloves, measure how much you want to cut off of each fingertip of the glove and mark.
        2. Cut the fingertips off of the gloves. PRO TIP: To prevent fraying, use Fray Check to seal the raw edges where you cut the fingertips.
        3. If desired, now is the time to add iron on patches to the outer gloves. Position the patches on the glove, place protective fabric on top of the glove and patch. Press with an iron according to the directions of the patches. Repeat on the other glove.
        4. Put the pair of gloves you didn’t cut on and put the fingerless gloves on top of those and enjoy!

        Get more from this episode >>

        DIY Room Dividers
        10 of 20
        DIY Room Dividers

        MATERIALS:

        • 24” wide hollow closet door
        • Self-adhesive wallpaper
        • Water in spray bottle
        • Paint in desired color to compliment wallpaper
        • Paintbrush
        • Masking tape
        • Hinges
        • Casters with locks
        • Power drill
        • Screws

        INSTRUCTIONS:

        1. Paint the edges of your door. Allow to dry.
        2. Screw the two casters into the bottom of each door on each side.
        3. Apply the wallpaper by spraying the back with water, put it on the door and smooth out any bubbles. Repeat with all of the doors which become the panels of your divider. PRO TIP: Most rolls of wallpaper come in 27” widths which make it perfect to apply without having to seam anything.
        4. Once the wallpaper is dry, trim to the edge of each door with an X-Acto knife. PRO TIP: Wallpaper shrinks as it dries so allow it to dry completely first.
        5. Connect the doors by screwing the hinges into the side of each door, make sure to line them up properly first!
        6. Stand up your divider, place and enjoy!

        Get more from this episode >>

        DIY Paper Chain Wall Hang
        11 of 20
        DIY Paper Chain Wall Hang

        MATERIALS:

        • Branch, dowel or rod
        • Construction paper in various colors
        • Paper cutter, X-Acto knife and ruler or scissors
        • Hot glue gun and glue sticks
        • Cup hooks large enough for your branch x2

        OPTIONAL:

        • Invisible tape or school glue sticks

        INSTRUCTIONS:

        1. Cut a bunch of strips of paper in various colors to the same dimension. The size of the strips depends on how wide and big you want the rings to be.

        PRO TIP: Make one ring to size that you like first to determine the size.

        2. To start each chain, bring the ends of one strip together and secure with hot glue.

        PRO TIP: If you want to get the kids involved use invisible tape or school glue sticks instead!

        3. Loop a second strip through the first and secure together at the ends. Repeat adding links to the chain until you have the desired length of your wall hanging.

        PRO TIP: Visualize what you want the pattern to be and add colors in sections down each chain to create solid blobs as you add chains next to one another.

        4. Repeat steps 2-3 until you have as many chains as you need to fill the width of your branch.

        5. Slide the top link of each chain onto the branch.

        6. Use the cup hooks to hang the wall hanging and enjoy!

        Get more from this episode >>

        DIY Hidden Pocket Scarf
        12 of 20
        DIY Hidden Pocket Scarf

        MATERIALS:

        • Fleece
        • Pearls
        • Fabric Scissors
        • Fabric glue
        • Chalk
        • Ruler

        DIRECTIONS:

        1. Cut fleece into desired scarf size

        2. Fold over bottom portion

        3. Glue open sides with fabric glue

        4. Let dry

        5. Embellish with pearls or patches using fabric glue

        6. Enjoy!

        Get more from this episode >>

        DIY Winterfest Jewelry
        13 of 20
        DIY Winterfest Jewelry

        MATERIALS:

        • Snowflake pendant silicone molds
        • Hot glue gun and glue sticks
        • X-Acto knife
        • Cutting mat
        • Rhinestones with flat back
        • Gem-Tac
        • Jewel picker or bamboo skewer
        • Jewelry pliers
        • Jump rings
        • Desired jewelry materials such as earring hooks, necklace chain etc.

        OPTIONAL:

        • Glitter spray paint
        • Glitter
        • Mod Podge
        • Paintbrush

        INSTRUCTIONS:

        1. Make sure silicone mold is clean and dry.

        2. After allowing your glue gun to heat up thoroughly, fill the mold with hot glue. Make sure to thoroughly fill the corners and any details in the mold.

        PRO TIP: If you are using glitter glue sticks, place the rhinestones face down in the mold before you lay the glue so they are stuck into the pendant and you can skip the Gem-tac for larger rhinestones!

        3. Once the hot glue has cooled to room temperature, pop the snowflake pendant out of the mold.

        4. Clean the edges up by cutting any excess glue away with an X-Acto knife.

        5. If you didn’t use glitter glue sticks, spray paint or apply glitter and mod podge mixture to your snowflake pendant now. Allow to dry completely.

        PRO TIP: Mix your glitter and mod podge in a 1:1 ratio then apply with brush to avoid flaking.

        6. Use Gem-tac to adhere any rhinestones you want. A jewel picker will make the job easier, but a bamboo skewer with a bit of glue on the end will also help you pick up and place the jewels.

        7. Allow the glue to set before wearing.

        8. Use jewelry pliers and a jump ring to attach the snowflake pendant to desired jewelry materials.

        9. Wear and enjoy!

        Get more from this episode >>

        Winter Wreaths
        14 of 20
        Winter Wreaths

        MATERIALS:

          CHUNKY YARN WREATH

          • Thick wool yarn
          • Hot glue gun and glue sticks
          • Additional seasonal decor; optional
          • Wire wreath form
          • Optional: Floral wire

          BIRCH & PINECONE WREATH

          • Grapevine wreath
          • Sticks similar in width and color as the grapevine wreath
          • Pinecones of varying colors
          • Birch roll
          • Glue gun
          • Star punch
          • Optional: White paint and paint brush

          INSTRUCTIONS:

          TO CREATE THE CHUNKY YARN WREATH

          1. Wrap the wreath form with yarn.

          2. Cut three long strands of the yarn.

          3. Tie them together in a knot at one end

          4. Braid the yarn strands together. Hang the knot on something for tension if that helps you.

          5. Tie a knot at the end of the braid to secure and attach it to the wreath form with hot glue. You can secure it more with floral wire if necessary.

          6. Add additional seasonal details as desired.

          7. Hang and enjoy!

          TO CREATE THE BIRCH AND PINECONE WREATH

          1. Cut some sticks down to a good size for your wreath.

          2. Add a drop of hot glue to the end of a stick and insert it into the grapevine wreath. Repeat with multiple sticks all around the wreath.

          3. Use the star punch to create stars out of the birch roll.

          PRO TIP: You can print birch paper onto paper and use that instead of buying the birch roll.

          4. Attach the birch stars and the pinecones to the sticks.

          5. Hang and enjoy!

          Get more from this episode >>

          Frosted Glass Décor
          15 of 20
          Frosted Glass Décor

          MATERIALS:

          • Thick frames that stand alone

          FOR FRAMES WITH GLASS:

          • Chemical glass etching bottle
          • Paint brushes that you are willing to throw away

          FOR FRAMES WITH ACRYLIC:

          • Spray paint in “frosted glass”

          OTHER MATERIALS NEEDED:

          • Needle-nose pliers
          • Stickers that are the outline of shape or letter
          • Rubbing alcohol
          • Cotton swabs
          • Paper towel or rag
          • Rubber or plastic gloves
          • Hot glue gun and glue sticks

          OPTIONAL:

          • Ribbon for décor

          INSTRUCTIONS:

          Whether you have a frame that has a clear acrylic front or glass front all the steps are the same except how you get the “frosted glass” look.

          1. Decide what you want your frame to say. We are going to be focusing on the “negative” space, rather than the “positive”. That’s why we are using stickers instead of stencils.

          2. Remove the glass/acrylic from the frame. You will not need the back of the frame, so you can discard that.

          3. With needle-nose pliers, remove any tabs that were used to hold the glass and backing in place.

          4. Make sure your surface is clean on both sides.

          5. Take off the backing of the stickers and put them in place. Remember, we are going to be pulling these off so you want to make sure that they will come off easily and not leave residue.

          PRO TIP: If the stickers are too tacky put them on the back of your hand and peel them off a few times so they become less tacky.

          6. Determine if you have glass in your frame or acrylic and follow the directions below.

          DIRECTIONS FOR GLASS:

          • Follow the directions on your chemical etching directions since each manufacturer is a little different. We used armour etch cream.

          • Using a paint brush, cover the glass with the cream. Use a layer that is thick enough that you cannot see the glass anymore.

          • Keep the cream on for 60 seconds only. If you’re doing a large surface area, the first part will be done earlier. Make sure the last part stays on for a full 60 seconds.

          • Rinse with water

          DIRECTIONS FOR ACRYLIC

          • Go to a well-ventilated area and spray the frosted glass spray paint over the entire surface.

          • Let dry according to manufacturer’s directions, usually about 15 minutes.

          • Remove the stickers. If there is any residue, use a cotton swab dipped in alcohol to clean it up.

          • Next make sure that the glass/acrylic stays in place. Add hot glue to the four corners of the inside of your frame and drop in the frosted piece, press it down to attach securely.

          • If desired add ribbon using hot glue.

          • Display and enjoy!

          Get more from this episode >>

          Snow Day Fun
          16 of 20
          Snow Day Fun

          MATERIALS

            TO CREATE THE SNOW:

            • Baking soda
            • White conditioner
            • Bowl or another mixing vessel
            • Spoon

            TO CREATE THE SNOW GLOBE:

            • Paper plates
            • Sheet protectors
            • Markers for kids
            • Hot glue gun and glue sticks
            • Scissors

            TO CREATE THE MARSHMALLOW IGLOO:

            • Mini marshmallows
            • Non-toxic school glue
            • Foam brush
            • Paper bowls
            • 3oz paper cups
            • Paper plates
            • Hot glue gun and glue sticks
            • Scissors

            INSTRUCTIONS

            TO CREATE THE SNOW:

            1. Pour the baking soda into a bowl.

            2. Add some conditioner and stir.

            3. Keep stirring in conditioner until you have the desired snowy texture!

            TO CREATE THE SNOW GLOBE
            :

            1. Let your kids have fun drawing an image with markers on the center of a paper plate.

            2. While they do that, cut a circle out of the center of another paper plate with scissors so that you have about a 2” border.

            3. Place the sheet protector down over the circle you cut out and cut out a circle about ½” bigger.

            4. To create the window of your snow globe, glue the sheet protector circle to the side of the paper plate that curves upward.

            5. Grab the paper plate with your child’s drawing and use hot glue to adhere it to the paper plate with the window along the edge. Leave a few inches open to funnel in some snow.

            PRO TIP: When crafting with kids the adult to do the parts involving hot glue.

            6. Have your kids help you funnel in some glitter and faux snow.

            7. Seal up the opening with some hot glue and enjoy!

            TO CREATE THE MARSHMALLOW IGLOO:

            1. First create the structure for your igloo, place a paper plate upside down then flip a paper bowl upside down on top and attach with glue to the center of the plate.

            2. To create the entrance of the igloo cut a paper cup in half and glue it to what will become the front of the igloo.

            3. Set your kids up with some non-toxic glue, a foam brush, small paintbrush and mini marshmallows. Let the kids go to town adding marshmallows!

            PRO TIP: Tell your kids to use the small paintbrush for little roove around the edge of the bowl if they can’t get in there with the foam brush!

            Get more from this episode >>

            Off the Shoulder Turtleneck
            17 of 20
            Off the Shoulder Turtleneck

            MATERIALS:

            • Sweater
            • Thread in a color that matches your sweater
            • Hand sewing needle
            • Fabric scissor

            OPTIONAL:

            • Fray check
            • Dress form

            INSTRUCTIONS:

            FOR SWEATER WITH AN EXISTING TURTLENECK

            1. Lay your sweater down on a flat surface and make sure all of the seams are aligned.

            2. Pinch the front of the sweater just under the seam of the turtleneck and cut just the front of the sweater, leave the neck connected on one side by about 6”. 3” in the front and 3” in the back. Cut the back of the sweater along the line you cut on the front.

            3. Now you need to cut one of the sleeves off! On the front of your sweater begin cutting on the line you cut the turtleneck in a diagonal direction until you’ve cut off the sleeve.

            PRO TIP: Cut ½” higher than desired for seam allowance.

            4. Fold the cut edge down inside the sweater and do a simple running stitch with your needle and thread to hem.

            PRO TIP: Use fray check to seal any edges you are worried about unraveling.

            5. When you cut the sleeve, the body of the sweater can widen. If you have a dress form go ahead and use that, but if not put the sweater on and see if the fit of your sweater has been affected. If necessary, take the sweater in on the side you cut.

            6. Enjoy!

            TO TRANSFORM A CREWNECK SWEATER

            1. Lay your sweater down on a flat surface and make sure all of the seams are aligned.

            2. Cut the sleeve of the sweater off at a diagonal toward the collar leaving about 6” of the hem of the crewneck on one side. 3” in the front and 3” in the back.

            PRO TIP: Cut the sweater ½” higher than desired for seam allowance.

            3. Take the sleeve and cut off any excess fabric from the shoulder. Feed the top of the sleeve into the cuff to create a circle. Use your needle and thread to secure it. Now you have a turtleneck to add to your sweater!

            4. Sew the turtleneck to what is left of the crewneck’s hem.

            5. Fold the cut edge of the sweater in and hem with a running stitch.

            6. When you cut the sleeve, the body of the sweater can widen. If you have a dress form go ahead and use that, but if not put the sweater on and see if the fit of your sweater has been affected. If necessary, take the sweater in on the side you cut.

            7. Enjoy!

            Get more from this episode >>

            Winter Mantlescape
            18 of 20
            Winter Mantlescape

            MATERIALS

              TO CREATE THE FAUX BIRCH BIRDHOUSES:

              • Birch roll
              • Cardboard craft tubes
              • X-acto knife
              • Birch paper
              • Spray adhesive
              • Small wooden dowel
              • Ruler
              • Glue gun with low-temp heat setting
              • Glue sticks
              • White paint
              • Foam core

              DÉCOR:

              • Birch logs
              • Faux powdered snow
              • Pinecones
              • White baby’s breath
              • White vases
              • Wooden vases
              • Silver candlesticks
              • Large basket

              INSTRUCTIONS:

              1. First, you want to create a frame roof for your birdhouse. From the top of the tube, mark a centerline at the opposite sides of the top edge of the tube. Then mark the two other opposite center lines and measure two inches down from there, these will be the low points of your roof.

              2. Draw a swoop from the 2” mark to the two adjacent centerlines on each side to create a “u” shape.

              3. Cut two 2” deep “u” shapes from the centerline at the top of the tube.
              Pro tip: Use your x-acto knife in a swooping motion away from your body.

              4. On the front of your birdhouse about 1/3 up from the bottom cut a 1 ½-2” diameter use an x-acto knife to cut a hole depending on the size of your tube.

              5. Use spray adhesive to attach the birch paper to the tube. Trim with an x-acto knife.
              Pro tip: Spraying the back side of the paper then rolling the tube on makes for a smooth application.

              6. To create the roof, cut two small rectangles out of foam core. Glue them together in an “a” frame shape using a low-temp hot glue gun.

              7. Glue the roof to the top of the house.

              8. Attach the birch roll to the top of the roof.

              9. If desired, create a small perch just below the circle on the front of the house. Cut a small dowel down to size and paint it white. Use hot glue to attach.

              10. Arrange your mantle as desired and enjoy!
              Pro tip: Add the snow last once you like the placement of everything to avoid a mess!

              Get more from this episode >>

              Snowflake Lanterns
              19 of 20
              Snowflake Lanterns
              DIY Snowflake Laterns
              Level:
              Intermediate
              How-To:
              Home Decor
              Seasonal Event:
              Christmas, Winter

              MATERIALS:

              • Wax paper
              • Popsicle sticks or wooden drink stirrers
              • White acrylic paint
              • Artist paintbrush
              • Cutting mat
              • X-acto knife
              • Spray adhesive
              • Electric tealights

              OPTIONAL:

              • Snowflake stencil
              • Stencil brush

              INSTRUCTIONS:

              1. Cut two wax paper rectangles that are 6” x 24” with an x-acto knife. You want to make sure that the cuts are straight, so they sit flush to the table.
              2. Use an artist brush to create your snowflakes with the paint by painting six lines that intersect in the center then accent lines in the shapes of a “v” on each branch of the snowflake. If you’d prefer to use stencils go ahead! Allow the paint to dry completely before the next step.
              3. Apply spray adhesive to the back of the wax paper and apply popsicle sticks to the top and bottom edges of the paper. Make sure the popsicle sticks are parallel to each other so when it stands, it creates a square. Leave 1” of wax paper on one end without any sticks to later fold and attach to the inside of the other end.
              4. Spray the other rectangle of wax paper with spray adhesive, line it up and apply it to the backside of the other piece to cover the popsicle sticks.
              5. Fold the rectangle, creasing it in between each popsicle stick to create four sides and to create the 1” flap on one end.
              6. Use spray adhesive to attach the flap to the inside of the other end.
              7. Place your lantern, drop an electric tealight in and enjoy!

              TO SNOWFLAKE AN EXISTING LANTERN

              1. Remove the glass from the lanterns.
              2. Cut the wax paper to size of the glass.
              3. Use an artist brush to create your snowflakes with the paint by painting six lines that intersect in the center then accent lines in the shapes of a “v” on each branch of the snowflake. If you’d prefer to use stencils go ahead! Allow the paint to dry completely before the next step.
              4. Use spray adhesive to attach the paper to the glass.
              5. Place the glass back in the lantern, place a tealight in and enjoy!

              Get more from this episode >>

              Beaded Fringe Scarves
              20 of 20
              Beaded Fringe Scarves

              MATERIALS:

              • Scarves with fringe
              • Fashion bead strands

              INSTRUCTIONS:

              1. Lay your scarf out on a flat surface with the fringe laid out straight.

              2. Count out your bead strands and figure out how you want to space them on in the fringe.
              Pro tip: Before purchasing, bend the plastic string the beads come on, if it has an elastic quality and is bendable the beads are new and good to use! If the plastic string frays or cracks the beads are old. Old bead strands will not work for this project because they will break.

              3. Fold each bead strand in half and lay them with the center fold just above the fringe pieces where you want to attach it.

              4. Tie two pieces of fringe together around the center of the bead strand. Tie a double knot for security.

              5. Repeat step 4 until you’ve added all the bead strands desired and enjoy!

              Get more from this episode >>

              ADVERTISEMENT
              ADVERTISEMENT
              ADVERTISEMENT