

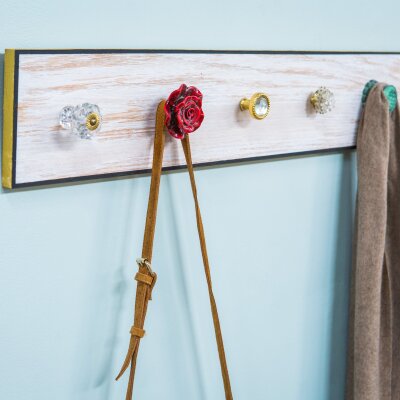
DIY Vintage Doorknob Coat Rack
Level:
Advanced
How-To:
Storage
DIY VINTAGE DOORKNOB COAT RACK MATERIALS:
- Vintage knobs from doors or dressers
- 1” thick plywood
- Paint
- Paintbrushes
- Paint rags
- Drill
- Drill bit to width of bolt on knobs
- Hand saw
- French cleat
- Screws
- Tape measure
- Pencil
- Level
OPTIONAL:
- Circular saw
- Painter’s tape
DIY VINTAGE DOORKNOB COAT RACK INSTRUCTIONS:
- Cut or have the plywood cut down to desired size of coat rack for your space. A good general size is 6” x 36”.
- If you want to paint a wash on your wood, put a drop of paint into some water and brush on. Allow to dry. Have fun with the paint, this is where you can get really creative by adding a border or other decorative elements! Pro tip: use a rag to wipe away excess paint to get an even more sheer effect when applying the wash.
- Space and mark where to drill the holes for the knobs. About 6” apart works.
- Drill through the board to create the holes.
- Place a knob in each hole and screw the backing nut onto the threaded bolt of the knob.
- If the bolt is sticking out too much on the backside, use a handsaw to cut off the excess from the back of the rack.
- Screw half of the french cleat into the back of the rack and the other half to the wall so that they fit together. Use a level to make sure everything is straight.
- Hang and enjoy!
