
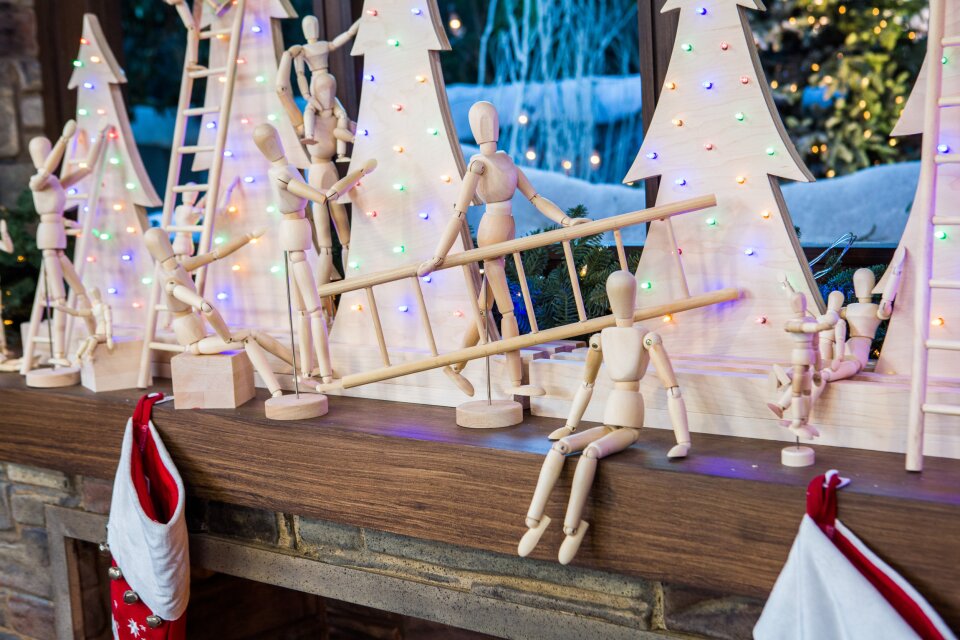

DIY Retro Christmas Forest
Level:
Intermediate
How-To:
Home Decor
Seasonal Event:
Christmas
MATERIALS:
TO CREATE THE TRACK:
- 1” x 6” cut to 36” long
- 1” x 2” cut to 36” long x 4
- 8 clamps
- Wood glue
- Tape measure and pencil
- Optional:
- Saw
TO CREATE THE TREES:
- 1” x 6” wood
- Pencil
- Jigsaw
- Tape measure
- Led multi-color string lights
- ¼” drill bit or bit to size of the lights you’re using
- Sanding block
- Masking tape
TO DECORATE:
- Drawing figurines in various miniature sizes like 4”,5” and 6”
- ¼” wooden dowels
- Saw
- Hot glue gun and glue sticks
INSTRUCTIONS:
- Cut the track pieces to length. You can also have them cut at your local hardware store since they’re straight cuts.
- Attach the tracks with the 1” side butted up against the face of the 6” side. Glue and clamp overnight to secure in place. PRO TIP: Use a scrap piece of the tree wood to space the tracks as you place them.
- Draw out the tree shapes onto the wood. The measurements we cut to were 36”, 24” and 18” tall, 12” wide.
- Cut the trees out using a jigsaw.
- Sand any rough edges.
- Create the holes for the lights map out with pencil where you want each light to poke through. Drill through each mark with a ¼” drill bit or a bit big enough to fit the lights you’ve purchased through the hole.
- Light the trees. Place each tree in a track, stick an individual light through each hole, use masking tape to secure in place on the backside of each tree. PRO TIP: have the lights on while you do this to make sure you don’t clutter the same color bulbs together.
- To create the ladders, cut the wooden dowels into 2” pieces for the steps and hot glue them in between two longer pieces of dowel with even spacing. Repeat to make as many ladders of as many heights as desired.
- Arrange the ladders and figurines to make it look like they are decorating the trees, hot glue in place to secure.
- Place in décor, turn on the lights and enjoy!
