
Materials
- Birch waterproof ribbon
- Hot glue/glue gun
- Rope, twine and/or burlap ribbon
- Wooden spoon
- Piece of plywood or hard wood to serve as the back of the bird feeder holding the cans
- White paint
- Scissors
- 6 tin cans
- Screws
- Screw gun
- French cleat or 2 eye hooks
- Bird seed
- Optional: sand-paper
- Optional: mod podge
- Optional: sponge brush
- Optional: wooden plaque
Instructions:
1. Make sure tin cans are clean and dry.
Note: discard the tops if you are using the craft cans that come with lids.
2. If you are recycling a can from your kitchen, look for any rough spots, and use some heavy-duty sandpaper to smooth the edges.
3. If you sanded it, wipe it down again so that it’s clean and dry.
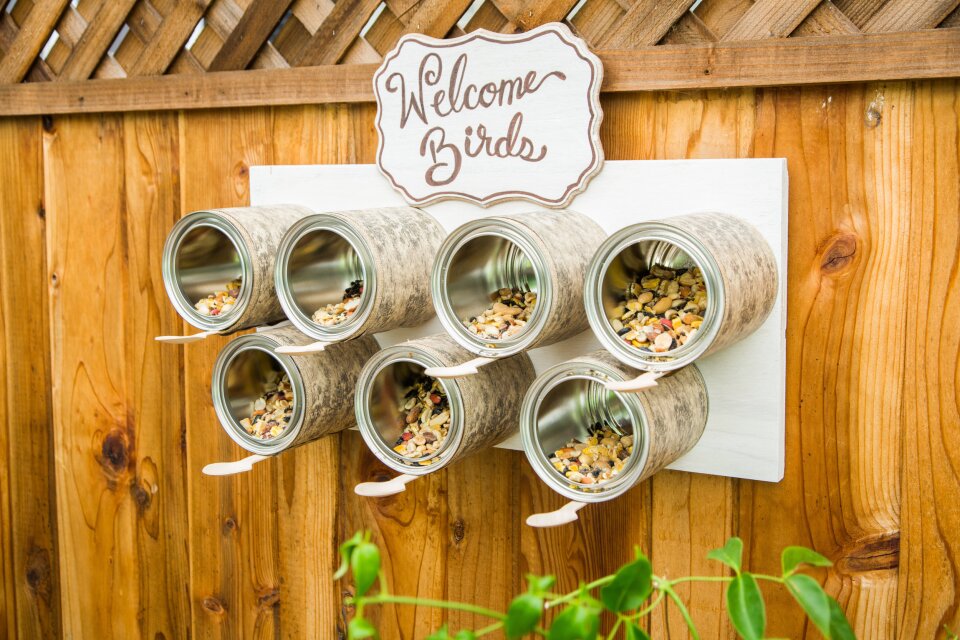
4. Add burlap ribbon to the top sides of your tin can. Secure with hot glue.
5. Hot glue the wooden spoon handle to the bottom of the can, extending out far enough to give our bird friends ample area to sit and grab some food.
6. Add waterproof birch ribbon around the middle of your can, equally spaced between your birch ribbon, making sure to cover the handle of your spoon. Secure with hot glue.
7. Take a board any size you would like, and paint it with a white-wash or dry brush to create a weathered effect. The board i am using is 21” long by 10” tall. (this measurement will be determined by the size and number of your cans.)
8. Add hot glue to the base of the tin can and set it on the board. Continue this until all cans are in place on your board.
