

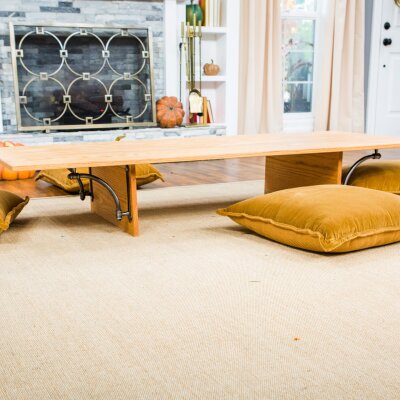
DIY Floor Table
Level:
Advanced
How-To:
Home Decor
Seasonal Event:
Fall, Summer
MATERIALS:
- Red oak plywood or plywood of desire
- Wood trim
- “L” shelf brackets (There is no specific brand for the brackets they are just “L” shaped shelf brackets.)
- Furniture wax (What we used is called Speed Wax, but any type of finishing wax or lacquer works.)
- Rags or brush
- Nail gun
- Drill
- Screws
- Tape measure
OPTIONAL:
- Circular or table saw
- Wood glue
DIY Floor Table - Home and Family
INSTRUCTIONS:
- First cut your wood down to desired size for your tabletop. You can also have this done at the hardware store since they’re all straight cuts.
- Cut the pieces of wood that will become the legs to size. Remember this is a floor table so measure a comfortable sitting height for you and your family. Again, the cutting can be done at most hardware stores if desired.
- Cut your wood trim to length for each side of the table.
- Attach the wood trim to each edge to finish them using a nail gun, add wood glue to back of the trim for extra security of desired.
- Attach the legs to what will become the bottom of your table. Space them evenly inset from the edges and screw the brackets in. The bigger your table, the more support you will need, so if making a very large table you may need more than two legs. PRO TIP: the length of your screws depends on the thickness of your wood.
- Finish the table with furniture wax to seal and protect the surface. Apply with rags or a brush and allow to dry according to the instructions of the particular wax you use. Enjoy!
NOTE:
- The measurements of the table we used were 6’ x 30” tabletop, 24” x 12” legs (All of the measurements in this scenario are up to the person who decides to do the project)
